Change NTP and Timezone CentOS/RHEL 7.x
Pre-installation, checking your current OS Version :
[root@host02 ~]# cat /etc/redhat-release
CentOS Linux release 7.1.1503 (Core)
INSTALL NTP AND NTPDATE
[root@host02 ~]# yum install ntpdate ntp -y
Sync your time to NTP Server (global)
Because we are in Indonesia we use this one :
[root@host02 ~]# ntpdate -u 0.id.pool.ntp.org
10 Mar 22:20:12 ntpdate[8437]: step time server 202.146.247.134 offset 140.931464 sec
just a second, your current time is being synchronize with the NTP Server
Re-check your pool NTP server for your location.
Check after synchronizing :
[root@host02 ~]# date
Thu Mar 10 22:20:16 EST 2016
[root@host02 ~]# timedatectl
Local time: Fri 2016-03-11 10:44:01 WIB
Universal time: Fri 2016-03-11 03:44:01 UTC
RTC time: Fri 2016-03-11 03:44:01
Time zone: Asia/Jakarta (WIB, +0700)
NTP enabled: yes
NTP synchronized: yes
RTC in local TZ: no
DST active: n/a
CONFIG YOUR MACHINE TO NTP SERVER
[root@host02 ~]# vi /etc/ntp.conf
Add some NTP Server, such as below :
# Use public servers from the pool.ntp.org project.
# Please consider joining the pool (http://www.pool.ntp.org/join.html).
#server 0.centos.pool.ntp.org iburst
#server 1.centos.pool.ntp.org iburst
#server 2.centos.pool.ntp.org iburst
#server 3.centos.pool.ntp.org iburst
server 0.id.pool.ntp.org
server 1.id.pool.ntp.org
server 2.id.pool.ntp.org
server 3.id.pool.ntp.org
START AND ENABLE SERVICE
[root@host02 ~]# systemctl start ntpd
[root@host02 ~]# systemctl enable ntpd
Created symlink from /etc/systemd/system/multi-user.target.wants/ntpd.service to /usr/lib/systemd/system/ntpd.service.
CHECK STATUS SERVICE
[root@host02 ~]# systemctl status ntpd
● ntpd.service - Network Time Service
Loaded: loaded (/usr/lib/systemd/system/ntpd.service; enabled; vendor preset: disabled)
Active: active (running) since Thu 2016-03-10 22:21:00 EST; 12s ago
Main PID: 8446 (ntpd)
CGroup: /system.slice/ntpd.service
└─8446 /usr/sbin/ntpd -u ntp:ntp -g
FIND YOUR LOCATION :
[root@host02 ~]# timedatectl list-timezones
SET YOUR TIMEZONE :
[root@host02 ~]# timedatectl set-timezone Asia/Jakarta
ENSURE YOUR LOCALTIME :
[root@host02 ~]# ls -l /etc/localtime
lrwxrwxrwx. 1 root root 34 Mar 11 10:24 /etc/localtime -> ../usr/share/zoneinfo/Asia/Jakarta
install-proftpd-with-tls-on-ubuntu-15-10
FTP is a very insecure protocol because all passwords and all data
are transferred in clear text. By using TLS, the whole communication can
be encrypted, thus making FTP much more secure. This article explains
how to set up ProFTPd with TLS on an Ubuntu 15.10 server, how to add an
FTP user and to use FileZilla to connect securely with TLS.
Because we must run all the steps from this tutorial with root privileges, we can either prepend all commands in this tutorial with the string sudo, or we become root right now by typing
Run proftpd: <-- standalone
For security reasons, you should add the following lines to /etc/proftpd/proftpd.conf:
State or Province Name (full name) [Some-State]:<-- Enter your State or Province Name.
Locality Name (eg, city) []:<-- Enter your City.
Organization Name (eg, company) [Internet Widgits Pty Ltd]:<-- Enter your Organization Name (e.g., the name of your company).
Organizational Unit Name (eg, section) []:<-- Enter your Organizational Unit Name (e.g. "IT Department").
Common Name (eg, YOUR name) []:<-- Enter the Fully Qualified Domain Name of the system (e.g. "server1.example.com").
Email Address []:<-- Enter your Email Address.
and secure the generated certificate files.
Restart ProFTPd afterward:
If you're having problems with TLS, you can take a look at the TLS log file /var/log/proftpd/tls.log.
The next step is to set a password for the user tom, execute the passwd command:
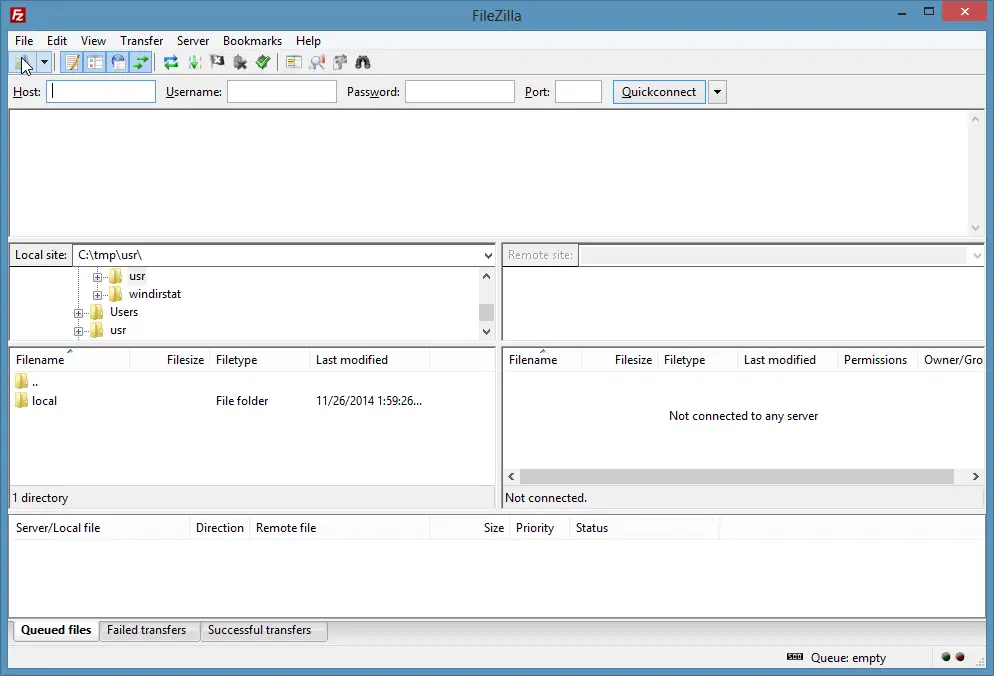
In FileZilla, open the Site Manager:
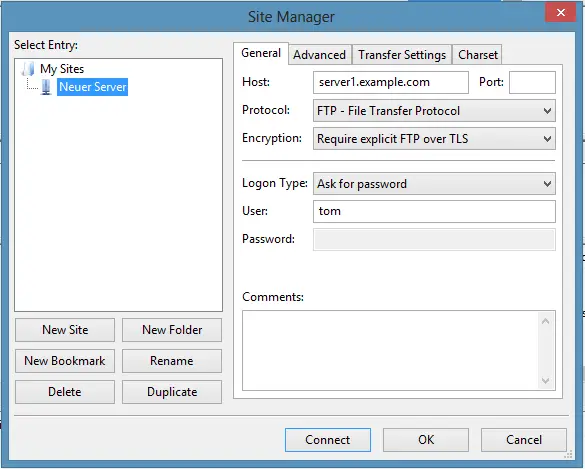
Select the server that uses ProFTPd with TLS; in the Server Type drop-down menu, select FTPES instead of normal FTP:
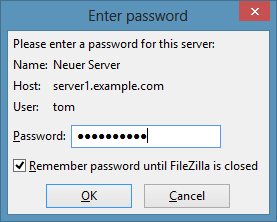
Now you can connect to the server, FileZilla will ask for a password.
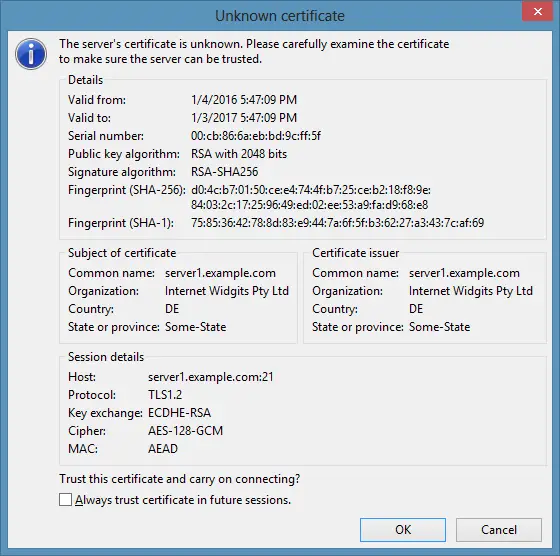
If you do this for the first time, you must accept the server's new SSL certificate:
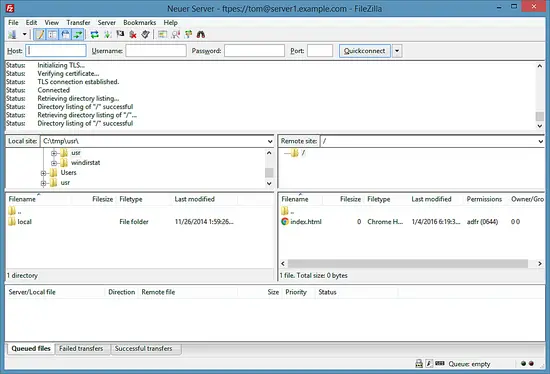
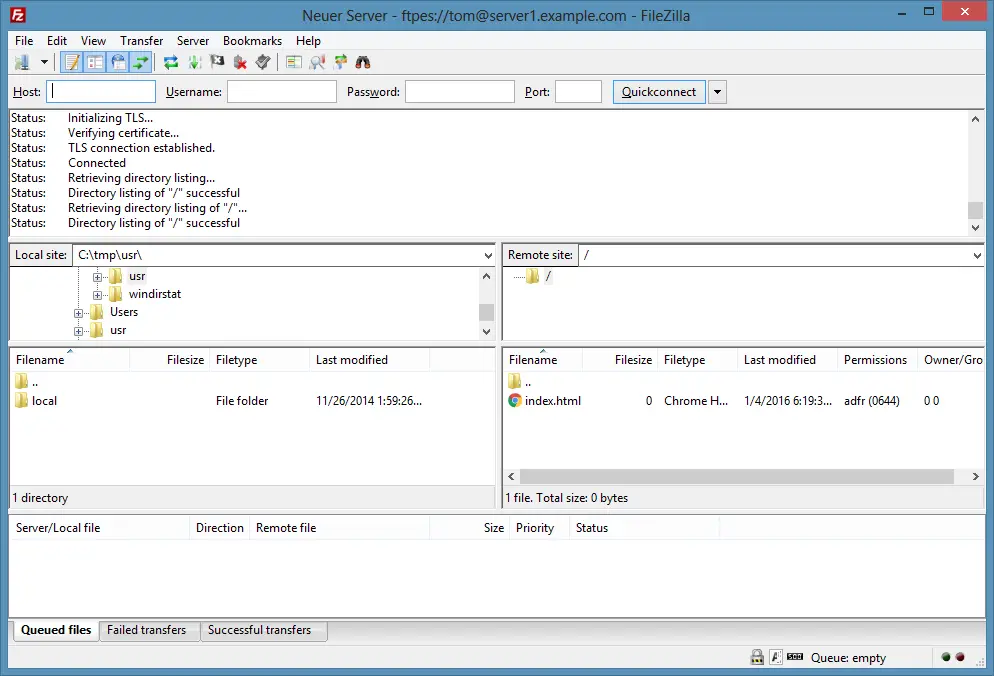
If everything goes well, you should now be logged in on the server:
https://www.howtoforge.com/tutorial/install-proftpd-with-tls-on-ubuntu-15-10/
1 Preliminary Note
In this tutorial, I will use the hostname server1.example.com with the IP address 192.168.1.100. These settings might differ for you, so you have to replace them where appropriate.Because we must run all the steps from this tutorial with root privileges, we can either prepend all commands in this tutorial with the string sudo, or we become root right now by typing
sudo su
I will use the nano editor to edit configuration files in this
tutorial. If you like to use nano as well and haven't installed it yet,
then run this command to install nano.
apt-get install nano
2 Install ProFTPd and OpenSSL
OpenSSL is needed by TLS; to install ProFTPd and OpenSSL, we simply run:
apt-get install proftpd openssl
You will be asked a question:Run proftpd: <-- standalone
For security reasons, you should add the following lines to /etc/proftpd/proftpd.conf:
nano /etc/proftpd/proftpd.conf
[...]
DefaultRoot ~
ServerIdent on "FTP Server ready."
[...]
The first option enables chrooting of FTP users into their home directory and the second option enables a ServerIdent message that does not contain any information about the used FTP server software, version or OS so that a potential attacker don't gets these details on the silver plate.
3 Create the SSL Certificate for TLS
In order to use TLS, we must create an SSL certificate. I create it in /etc/proftpd/ssl, therefore I create that directory first:
mkdir /etc/proftpd/ssl
Afterward, we can generate the SSL certificate as follows:
openssl req -new -x509 -days 365 -nodes -out /etc/proftpd/ssl/proftpd.cert.pem -keyout /etc/proftpd/ssl/proftpd.key.pem
Country Name (2 letter code) [AU]: <-- Enter your Country Name (e.g., "DE").State or Province Name (full name) [Some-State]:<-- Enter your State or Province Name.
Locality Name (eg, city) []:<-- Enter your City.
Organization Name (eg, company) [Internet Widgits Pty Ltd]:<-- Enter your Organization Name (e.g., the name of your company).
Organizational Unit Name (eg, section) []:<-- Enter your Organizational Unit Name (e.g. "IT Department").
Common Name (eg, YOUR name) []:<-- Enter the Fully Qualified Domain Name of the system (e.g. "server1.example.com").
Email Address []:<-- Enter your Email Address.
and secure the generated certificate files.
chmod 600 /etc/proftpd/ssl/proftpd.*
4 Enable TLS in ProFTPd
In order to enable TLS in ProFTPd, open /etc/proftpd/proftpd.conf...
nano /etc/proftpd/proftpd.conf
... and uncomment the Include /etc/proftpd/tls.conf line:[...] # # This is used for FTPS connections # Include /etc/proftpd/tls.conf [...]Then open /etc/proftpd/tls.conf and make it look as follows:
nano /etc/proftpd/tls.conf
<IfModule mod_tls.c>
TLSEngine                  on
TLSLog                     /var/log/proftpd/tls.log
TLSProtocol TLSv1.2
TLSCipherSuite AES128+EECDH:AES128+EDH
TLSOptions                 NoCertRequest AllowClientRenegotiations
TLSRSACertificateFile      /etc/proftpd/ssl/proftpd.cert.pem
TLSRSACertificateKeyFile   /etc/proftpd/ssl/proftpd.key.pem
TLSVerifyClient            off
TLSRequired                on
RequireValidShell          no
</IfModule>
If you use TLSRequired on, then only TLS connections are allowed (this locks out any users with old FTP clients that don't have TLS support); by commenting out that line or using TLSRequired off both TLS and non-TLS connections are allowed, depending on what the FTP client supports.
Restart ProFTPd afterward:
systemctl restart proftpd.service
That's it. You can now try to connect using your FTP client; however, you should configure your FTP client to use TLS (this is a must if you use TLSRequired on) - see the next chapter how to do this with FileZilla.If you're having problems with TLS, you can take a look at the TLS log file /var/log/proftpd/tls.log.
5 Add an FTP user
The ProFTPD configuration used in thus tutorial authenticates users against the Linux system user database (/etc/passwd and /etc/shadow). In this step, I will add a user "tom" to be used for FTP login only.
useradd --shell /bin/false tom
This will add the user "tom" with the shell /bin/false. This shell ensures that he can login by FTP but not by SSH. The home directory of a user is /home/[USERNAME] by default, in our case /home/tom. ProFTPD is configured to jail the user to his home directory, so he can not access system files outside of /home/tom. If you like to set a different home directory, use the command below:
useradd --home /srv/tomftp --create-home --shell /bin/false tom
This command sets a different home directory, in case of this example the directory /srv/tomftp for the user.The next step is to set a password for the user tom, execute the passwd command:
passwd tom
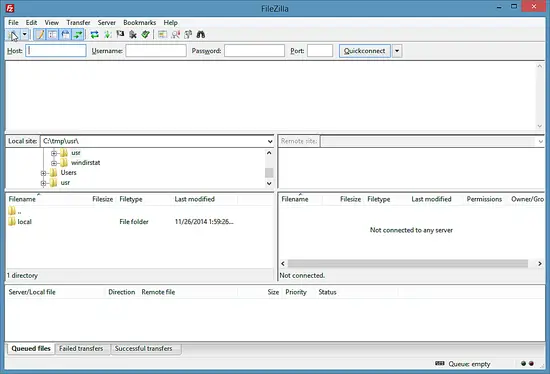
And enter the new password twice, when requested.6 Configuring FileZilla for TLS
In order to use FTP with TLS, you need an FTP client that supports TLS, such as FileZilla.In FileZilla, open the Site Manager:
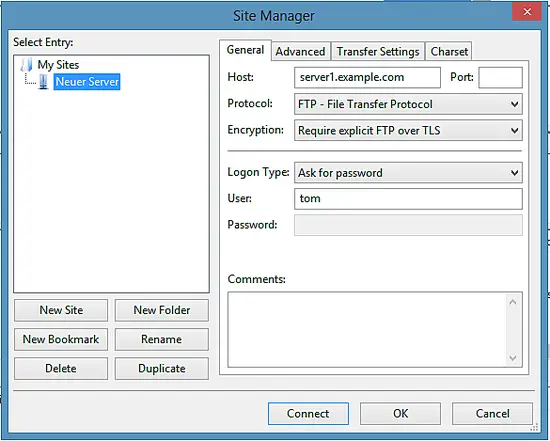
Select the server that uses ProFTPd with TLS; in the Server Type drop-down menu, select FTPES instead of normal FTP:
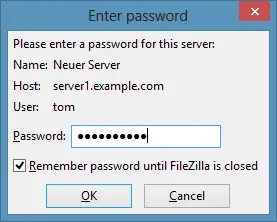
Now you can connect to the server, FileZilla will ask for a password.
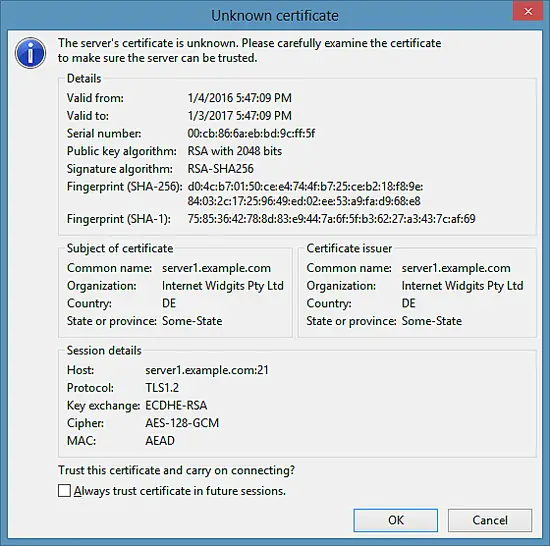
If you do this for the first time, you must accept the server's new SSL certificate:
If everything goes well, you should now be logged in on the server:
https://www.howtoforge.com/tutorial/install-proftpd-with-tls-on-ubuntu-15-10/
Using Find in Linux
The following examples illustrate typical uses of the command find for finding files on a computer.
find / -name game find /home -user joe find /usr -name *stat find /var/spool -mtime +60 find /tmp -name core -type f -print | xargs /bin/rm -f find /tmp -name core -type f -print0 | xargs -0 /bin/rm -fMYSQL TUNER SCRIPT
#!/usr/bin/perl -w
# mysqltuner.pl - Version 1.2.0
# High Performance MySQL Tuning Script
# Copyright (C) 2006-2011 Major Hayden - major@mhtx.net
#
# For the latest updates, please visit http://mysqltuner.com/
# Git repository available at http://github.com/rackerhacker/MySQLTuner-perl
#
# This program is free software: you can redistribute it and/or modify
# it under the terms of the GNU General Public License as published by
# the Free Software Foundation, either version 3 of the License, or
# (at your option) any later version.
#
# This program is distributed in the hope that it will be useful,
# but WITHOUT ANY WARRANTY; without even the implied warranty of
# MERCHANTABILITY or FITNESS FOR A PARTICULAR PURPOSE. See the
# GNU General Public License for more details.
#
# You should have received a copy of the GNU General Public License
# along with this program. If not, see <http://www.gnu.org/licenses/>.
#
# This project would not be possible without help from:
# Matthew Montgomery Paul Kehrer Dave Burgess
# Jonathan Hinds Mike Jackson Nils Breunese
# Shawn Ashlee Luuk Vosslamber Ville Skytta
# Trent Hornibrook Jason Gill Mark Imbriaco
# Greg Eden Aubin Galinotti Giovanni Bechis
# Bill Bradford Ryan Novosielski Michael Scheidell
# Blair Christensen Hans du Plooy Victor Trac
# Everett Barnes Tom Krouper Gary Barrueto
# Simon Greenaway Adam Stein Isart Montane
# Baptiste M.
#
# Inspired by Matthew Montgomery's tuning-primer.sh script:
# http://forge.mysql.com/projects/view.php?id=44
#
use strict;
use warnings;
use diagnostics;
use File::Spec;
use Getopt::Long;
# Set up a few variables for use in the script
my $tunerversion = "1.2.0";
my (@adjvars, @generalrec);
Hot Add Disk RHEL with LVM
Hot Add Disk RHEL
# echo ‘- – -’ > /sys/class/scsi_host/host0/scan
# pvcreate /dev/your_new_disk
# vgextend VolGroup01 /dev/your_new_disk
# lvextend -l 100%FREE /dev/Your_VG/Your_LV
# lvextend -L+1G /dev/myvg/homevol
# resize2fs /dev/mapper/VolGroup01-LogVol00
# echo ‘- – -’ > /sys/class/scsi_host/host0/scan
# pvcreate /dev/your_new_disk
# vgextend VolGroup01 /dev/your_new_disk
# lvextend -l 100%FREE /dev/Your_VG/Your_LV
# lvextend -L+1G /dev/myvg/homevol
# resize2fs /dev/mapper/VolGroup01-LogVol00
Kill Port Linux
# netstat -plten |grep java
tcp6 0 0 :::8080 :::* LISTEN
1000 30070621 16085/java
# kill -9 16085
# fuser -n tcp <port_number>
# fuser -n tcp <port_number> 2> /dev/null
# kill $(fuser -n tcp <port_number> 2> /dev/null)
tcp6 0 0 :::8080 :::* LISTEN
1000 30070621 16085/java
# kill -9 16085
# fuser -n tcp <port_number>
# fuser -n tcp <port_number> 2> /dev/null
# kill $(fuser -n tcp <port_number> 2> /dev/null)
IPTABLES BLOCK PORT part 1
Block Port : In/Out
Incoming :
iptables -A INPUT -p tcp --destination-port 80 -j DROP
In Specific interface :
iptables -A INPUT -i eth1 -p tcp --dport 80 -j DROP
Exception IP :
iptables -A INPUT -p tcp -i eth1 -s ! 122.222.80.xx --dport 80 -j DROP
Outgoing :
/sbin/iptables -A OUTPUT -p tcp --dport 25 -j DROP
Incoming :
iptables -A INPUT -p tcp --destination-port 80 -j DROP
In Specific interface :
iptables -A INPUT -i eth1 -p tcp --dport 80 -j DROP
Exception IP :
iptables -A INPUT -p tcp -i eth1 -s ! 122.222.80.xx --dport 80 -j DROP
Outgoing :
/sbin/iptables -A OUTPUT -p tcp --dport 25 -j DROP
CLAMAV CENTOS 6
[root@assp assp]# yum install clamav-db.x86_64 clamav-devel.x86_64 perl-ClamAV-Client.noarch clamav.x86_64 clamav-milter.x86_64 clamd.x86_64 perl-Mail-ClamAV.x86_64
[root@assp assp]# /etc/init.d/clamd start
Starting Clam AntiVirus Daemon: LibClamAV Error: cl_cvdhead: Can't read CVD header in /var/clamav/daily.cld
LibClamAV Error: cli_loaddbdir(): error parsing header of /var/clamav/daily.cld
ERROR: Malformed database
[FAILED]
[root@assp assp]# freshclam
ClamAV update process started at Fri Sep 14 19:54:14 2012
WARNING: DNS record is older than 3 hours.
WARNING: Invalid DNS reply. Falling back to HTTP mode.
Reading CVD header (main.cvd): OK
INSTALL PERL FROM SOURCE
[root@spam ~]# wget http://www.cpan.org/src/5.0/perl-5.12.3.tar.gz
--2012-09-12 05:40:13-- http://www.cpan.org/src/5.0/perl-5.12.3.tar.gz
Resolving www.cpan.org... 199.15.176.140, 212.117.177.118, 2620:101:d000:8::140:1, ...
Connecting to www.cpan.org|199.15.176.140|:80... connected.
HTTP request sent, awaiting response... 200 OK
Length: 14933787 (14M) [application/x-gzip]
Saving to: `perl-5.12.3.tar.gz'
[root@spam ~]# tar -xvf perl-5.12.3.tar.gz
[root@spam ~ perl-5-12xxxx]# Sh Configure -de -Dusethreads
CALCULATOR COMMAND LINE
hafiz ~ $ bc
bc 1.06.95
Copyright 1991-1994, 1997, 1998, 2000, 2004, 2006 Free Software Foundation, Inc.
This is free software with ABSOLUTELY NO WARRANTY.
For details type `warranty'.
2x3
(standard_in) 3: syntax error
2*3
6
10*3:5
(standard_in) 5: illegal character: :
(standard_in) 5: syntax error
10*3/5
6
CHECK PERL MODULE LINUX CENTOS
[root@spam ~]# perldoc -m Mail::Send
specify a minimum module version
( categories: perl modules )
Sometimes you must use a specific module version in your programs. To avod using earlier version of that module, append the minimum version number you want in the use 'module' statement:
Example:
#-- Use version 5.8 of later of module LWP
use LWP 5.8
Your program will exit with an appropriate error message if the installed module version is lower than the version you specified
execute commands on remote machines using ssh
( categories: system | perl modules )
You can execute commands on remote machines from a Perl script using the Net::SSH::Perl module.
This module allows you to execute a command remotely and receive the STDOUT, STDERR, and exit status of that remote command.
One big advantage of Net::SSH::Perl over other methods is that you can automate the login process, that way you can write fully automated perl scripts, no console interaction is required in order to authenticate in the remote machine.
Example:
list the installed modules
( categories: installing modules | perl modules )
There are several ways to obtain the list of perl modules installed in a system:
Linux and Windows FireFox issues : Error code: sec_error_reused_issuer_and_serial
It took me a while to figure it out from googling, but the solution is simply to delete the cert8.db from your FireFox profile, usually found in /home/hafiz/.mozilla/firefox/t5q6cggf(some-name).default and Easier still just search for cert8.db in your computer and delete that file. Close and Start again your firefox
Windows:
It took me a while to figure it out from googling, but the solution is simply to delete the cert8.db from your FireFox profile, usually found in C:\Documents and Settings\<yourname>\Application Data\Mozilla\Firefox\Profiles\<yourprofile>. Easier still just search for cert8.db in your computer and delete that file.
Oh….. you need close FireFox first
Got this information somewhere in net and worked fine for me.
Renaming Mail Server Zimbra
1. set your /etc/hosts
the /etc/hosts for lookup your new hostname mail system zimbra
2. set in your DNS
for new hostname mail system, the DNS must can be resolve a new fqdn / hostname zimbra with mx record
3. Step for changing a new hostname server zimbra
for example:
[zimbra@hafiz ~]$ /opt/zimbra/libexec/zmsetservername -n newhostname.hafiz.com
the /etc/hosts for lookup your new hostname mail system zimbra
2. set in your DNS
for new hostname mail system, the DNS must can be resolve a new fqdn / hostname zimbra with mx record
3. Step for changing a new hostname server zimbra
su - zimbra
/opt/zimbra/libexec/zmsetservername -n <servername>
for example:
[zimbra@hafiz ~]$ /opt/zimbra/libexec/zmsetservername -n newhostname.hafiz.com
set webmail zimbra http to https
set webmail zimbra http to https:
as a user zimbra follow the steps
changing the webmail over https
$ zmtlsctl https
restart the mail server zimbra for perform a new configuration
$ zmcontrol restart
now if you want to go the webmail point your browser to
https://your.webmail.com
as a user zimbra follow the steps
changing the webmail over https
$ zmtlsctl https
restart the mail server zimbra for perform a new configuration
$ zmcontrol restart
now if you want to go the webmail point your browser to
https://your.webmail.com
Subscribe to:
Posts (Atom)